Many of you who attended our webinar on Connecting Hadoop Big Data to Unica Campaign and Interact webinar requested that we provide more detailed technical information about how Unica Campaign was configured to work with Hadoop in the use cases we reviewed. Be forewarned! What follows is a highly technical integration guide of how to configure this type of connection in your environment and is not for the faint of heart.
If you are interested in understanding how Hadoop differs from traditional relational databases from a functional Unica Campaign perspective, you may find our blog on The Facts: Hadoop Big Data vs. Relational Databases more palatable.
The first step to connect your Unica Campaign environment to your Apache Hive instance is to download and install a Hive ODBC Driver. Unica Campaign v9.1.2 supports the DataDirect and the Clouder ODBC Drivers, while v10.0 is also to support the Hortonworks driver.
DataDirect Apache Hive ODBC Driver from Progress.com
Cloudera ODBC Driver for Apache Hive
Hortonworks 64-bit ODBC Driver
Step 2: Installing the Hive ODBC Drive
1. Download the Hive ODBC driver from one of the providers listed above.
2. Upload the RPM file to the server hosting the Campaign Listener (analytics server).
3. Download the UnixODBC Manager, unixODBC-2.3.4, available from unixodbc.org.
4. Upload the unixODBC-2.3.4.tar.gz file to the Campaign Listener server.
5. Extract the unixODBC-2.3.4.tar.gz file on your Campaign Listener server.
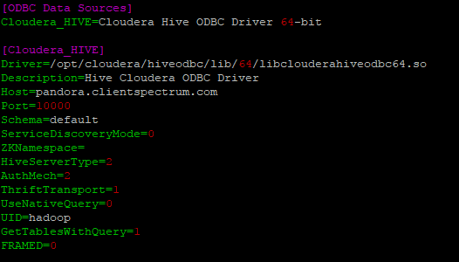
Once the ODBC driver is installed, you must configure your IBM Campaign server to be able to connect to the Hive distribution. First, you must configure the odbc.ini file which was either included with your Hive ODBC distribution or an existing driver. Edit the odbc.ini file and complete each of the configurations for your Hadoop/Hive instance.
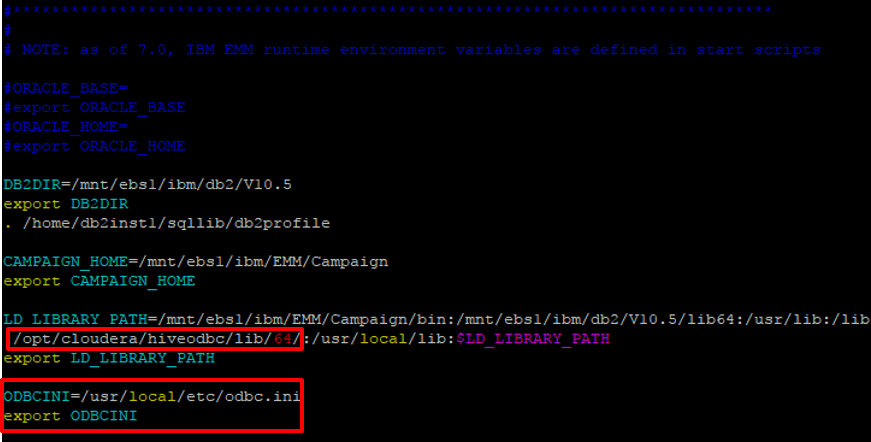
Step 4: Configure the Campaign Environment Variables
Navigate to the Campaign Home directory and then open the setenv.sh file in the /bin directory. Update the LD_LIBRARY_PATH environment variable to include the /lib/64 path from your Hive ODBC driver directory. You must also add a new variable named ODBCINI, which points to the odbc.ini file you edited in the previous step.
Click to enlarge
Step 5: Importing the Hive Data Source Template
IBM Campaign versions 9.1.2 and later will include a Hive data source template which can be imported into the configurations. Locate the file named BigDataODBCHiveTemplate.xml within the /conf directory of Campaign Home.
Navigate to the Platform Home, then to the /tools/bin directory. Inside this directory, you will find configTool.sh, which is used to edit Platform’s configuration settings.
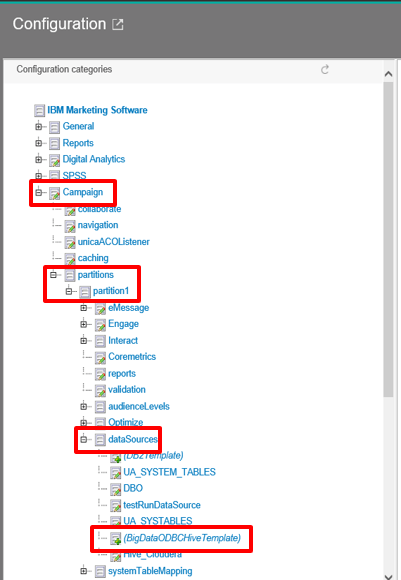
Within the Unica application, navigate to the Platform configurations via Settings -> Configuration. Locate the dataSources configurations in Campaign|partitions|partition1|dataSources. When you expand dataSources, you should see the option for (BigDataODBCHiveTemplate). If this option isn’t present, then the configTool command on the previous step was unsuccessful.
Click to enlarge
Enter all required properties into the template for your Hadoop/Hive instance.
**Note: Ensure the DSN property matches the name specified in the odbc.ini file.
Step 7: Adding Test Data
To test your Hive integration, you’ll need to create a test table and insert some data to query. For this example, we will use a file which represents data that was taken from an online mortgage tool and transformed to a simple .csv file.
Place your test .csv file into the HDFS using the hdsfs dfs command.
Step 8: Creating a Test Table
Next, create the Hive table using this command.
You must then ensure that the data types reflect the data that is in our test.csv file.
CREATE EXTERNAL TABLE IF NOT EXISTS MORTGAGE_ENGAGEMENT_WL( CookieID INT, time STRING, amortPeriod INT, term INT, rate INT, housePrice INT, downpayment INT, payFreq STRING) ROW FORMAT DELIMITED FIELDS TERMINATED BY ‘,’ STORED AS TEXTFILE location ‘/home/hadoop/test’;
Step 9: Adding Data to Test Table
Next, load the data from the MRTG_TOOL.csv file into your Hive table.
load data local inpath ‘/home/hadoop/MRTG_TOOL.csv’ into table MORTGAGE_ENGAGEMENT_WL;
Step 10: Mapping the Hive Tables
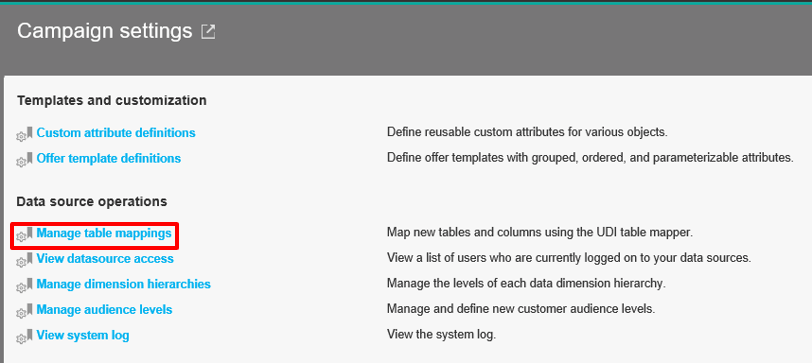
For this step, you’ll need to map your Hive tables. This is accomplished the same way as regular user table mapping. Navigate to Settings -> Campaign Settings -> Manage table mappings.
Click to enlarge
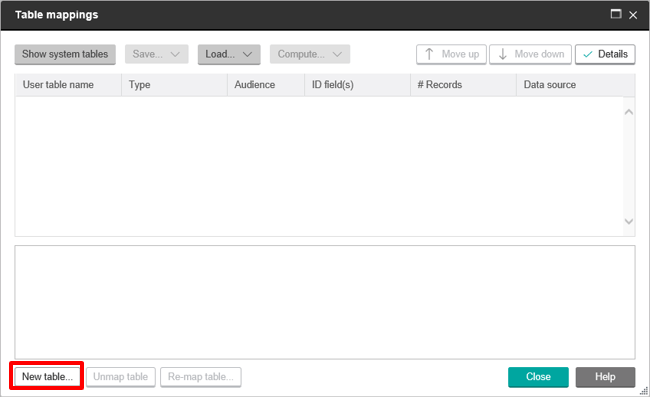
Since Hive tables will always be User Tables as opposed to System Tables, click on Show User Tables then click New Table.
Click to enlarge
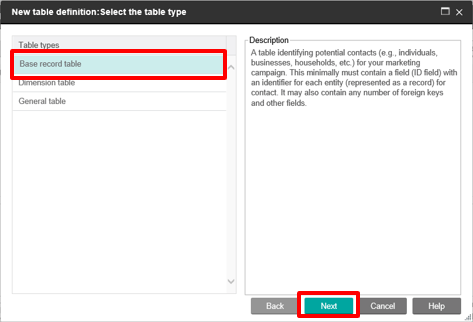
Select Base record table, then select your Hive data source that you created with the template in the Platform Configurations.
Click to enlarge
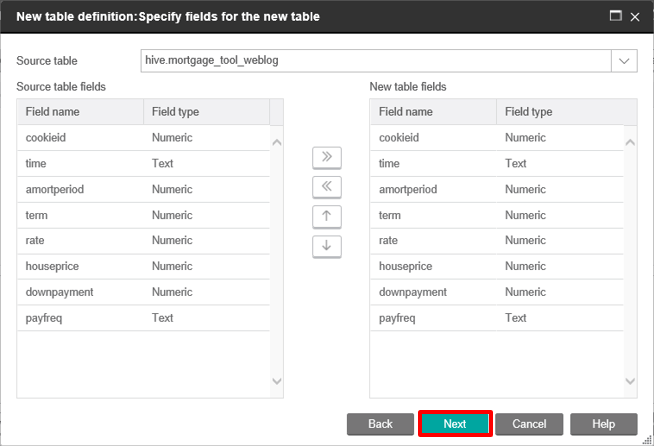
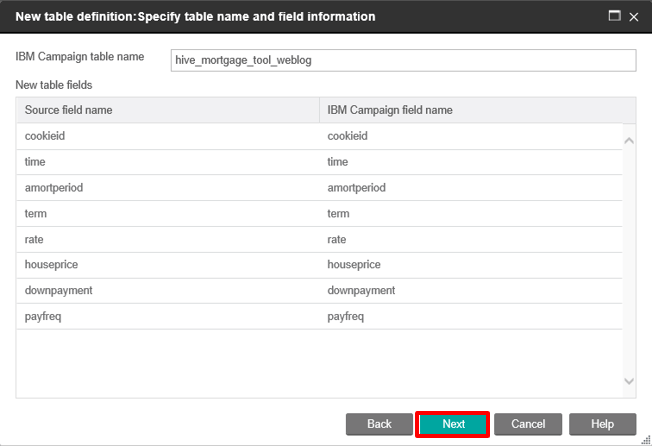
Select one of your Hive tables from the Source table drop menu. The Hive table fields should automatically populate. You can then change the name of the table that will appear in Campaign.
Ensure your field names match as expected, then click Next and enter the name for the table within Campaign.
Click to enlarge
Step 11: Confirm the Table Mapping
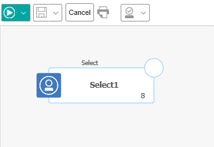
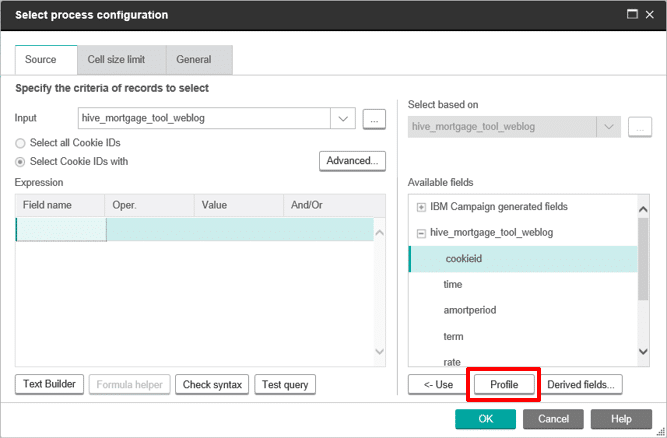
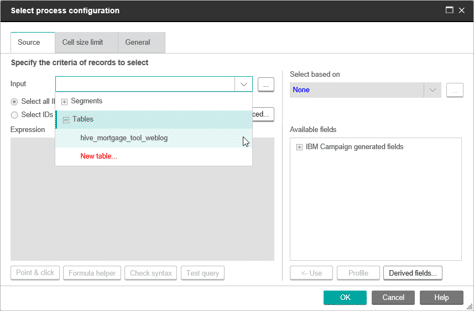
Finally, you will test to ensure that you can access the data in our table. Open any flowchart and select the new table as the Input in a process box.
Click to enlarge
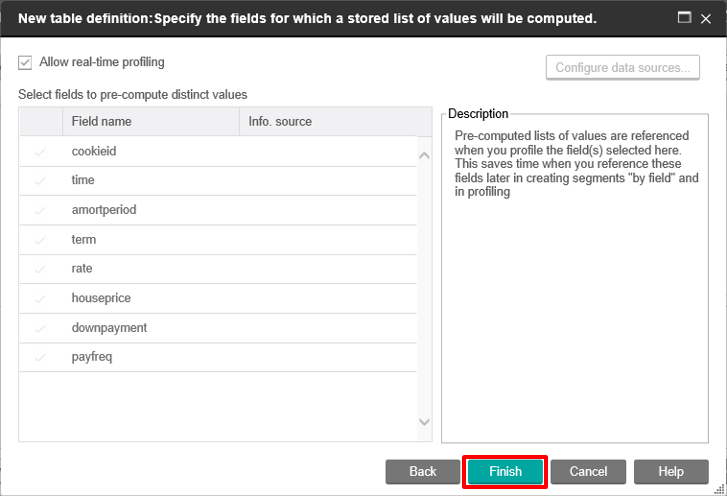
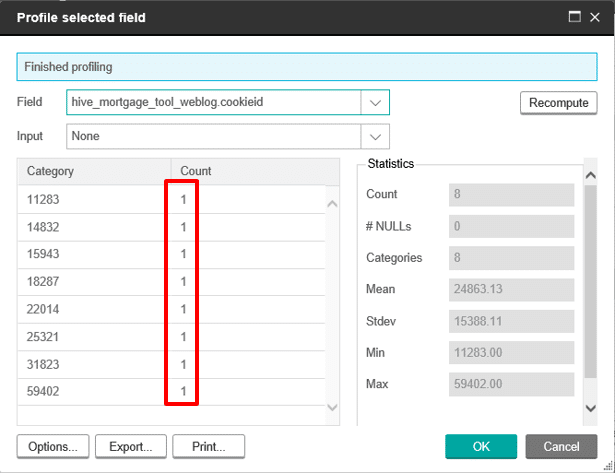
Profile any field in the table to confirm that the data is present and can be queried.
Click to enlarge
Still With Us?
If you are an experienced Unica Campaign administrator, you most likely noticed the commonalities with configuring traditional relational database sources – UDI (Universal Dynamic Interconnect), ODBC and flowchart process boxes remain relatively unchanged. Even so, those similarities are only skin deep, as working with Hadoop data sources typically demands a rethinking of how your campaigns can wield previously untouched, unstructured data.
If you are still struggling with your integration after reading the above steps, please reach out for advice and suggestions.
Nicholas Ford
MUNVO CONSULTANT
Nick is passionate about looking under the hood of complex marketing automation systems and explaining them to a diverse audience. This interest has lead Nick to deliver interactive and personalized experiences for clients in the telco, financial and retail industries. Nick is motivated by helping his clients to adopt and integrate emerging technologies such as Hadoop and cloud into their marketing ecosystems.
This guide provides a detailed, technical walkthrough for integrating Unica Campaign with Hadoop, specifically focusing on connecting Unica to Apache Hive using ODBC drivers.
The steps cover installing the Hive ODBC driver, configuring the ODBC settings and environment variables, importing a Hive data source template, and setting up test data and tables in Hive.
It then explains how to map Hive tables within Unica Campaign and verify the connection. The process involves configuring both the Unica environment and Hadoop, allowing Unica to access and query Hadoop’s unstructured data for campaign purposes.